 Monitoring the feeding station that you have set up for your lost dog will give you important clues to his behavior and condition. Here are a few different ways that it can be done, both low-tech and high-tech.
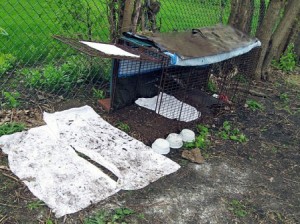
You can visually check the area every day when you replenish the food and water. By placing the bowls in some wet sand or mud, you will be able to check for dog tracks. In the wintertime, tracks will show up well in the snow. You can also sprinkle fireplace ash or cornstarch around the bowls, or place a damp white towel under the bowls to watch for footprints. Just make sure that you don’t disturb the location so much, that you make your dog suspicious and he moves on. Try to make your feeding station blend into the landscape.

Very low tech – using wet white towels checking to see if the dog was coming to the trap to eat food out of dish inside of the trap. Capture paw prints.
These simple methods have been used for years and are very effective, but they require the owner to have some basic knowledge of identifying tracks and understanding wildlife and domestic animal behavior. Trail cameras eliminate the need for this knowledge and are easy and fun to use!
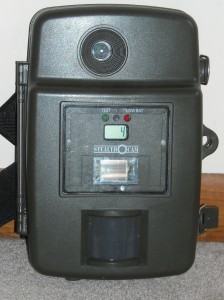
In the last few years, the popularity of digital trail or wildlife cameras has exploded. These cameras are often used by hunters, but they are also popular with wildlife enthusiasts who enjoy seeing what visits their backyard at night. There are now dozens and dozens of makes and models available everywhere from Walmart.com to higher end hunting and sporting goods stores.
If you have lost a shy, elusive dog try to beg, borrow or buy a trail camera. You may have a friend that has one that will let you borrow it or you may have to purchase one – but they are now readily available for less than $100, sometimes as low as $60 if you happen to catch a sale.
It doesn’t need to be a fancy model, and actually, simpler is probably better. It does need to have the ability to take daytime and nighttime pictures (infrared flash) with a date/time stamp.
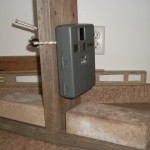
You aren’t looking for gallery quality photos – you just want to see if it is your dog that is eating the food, and what time of day he was there. Insert fresh batteries in the camera, and a blank SD card. Make sure the time/date stamp is set correctly and affix the camera to a solid object like a tree, or an overturned milk crate. You can also make a simple stand to hold the camera steady, such as the one in the picture.
You may have to fiddle with the camera position the first few days to make sure it is aimed well and getting the pictures you want. The camera instructions are usually written for deer, so bear this in mind when you are determining the height you place it at. It is better to have the camera set too low than too high. Try to get the camera far enough back from the food so that you can determine which way your dog is entering the scene and which way he is leaving.
When you check and replenish your feeding station, bring along your digital camera. Simply pop the SD card out of the trail camera and into your digital camera and review the pictures. If you see something but are having trouble determining what it is – take the SD card home (put a replacement in the trail camera) and check the pictures on your home computer. Sometimes looking at them in a darkened room will help. You may only see a tail or an ear, but it might be your dog!
Using trail camera pictures as a tool in your search will help you in two very important ways:
They will help you plan a strategy to catch your dog.
They will give you motivation and hope to continue. Your lost dog is there. You have the proof in the pictures. He is depending on you to safely bring him home. Part 8
Our tips, ideas and articles are based on information gathered from over thousands of successful lost dog recoveries. Any advice or suggestions made by Lost Dogs of Wisconsin/Lost Dogs Illinois is not paid-for professional advice and should be taken at owner’s discretion.

