I Got A Sighting! Now What? Part 5 of a series

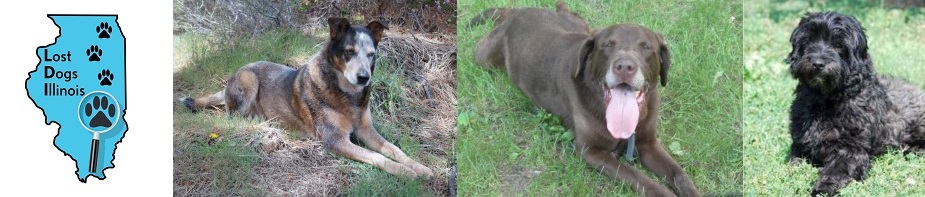
Toby is a shy Australian shepherd, spooked by the July 4th fireworks from a house other than his own. He bolted and has not been seen since. He has four of thefive risk factors that will make him an elusive dog to catch. You have enlisted the help of friends and family, not to “search” for Toby; but to help implement the steps of Five Things To Do If You Have Lost Your Dog.

And it worked! You got your first phone call! Time to rush out there with all your friends and bring Toby home! Right? Wrong…. Not so fast. Make sure you read and understand these steps thoroughly BEFORE you get that first sighting call. Because how you handle sightings can mean the difference between a successful recovery, or the failure to capture Toby safely.

Get yourself a small bound notebook to keep all of your sighting information in. This will be your Sighting Journal and you need to have it handy at all times. You never know when you will need to add to your notes or refer back to them. Just like a good police officer takes notes, so does an effective lost dog owner. Keep a printed map of the area with your sighting journal. Even though you may transfer your map information to Google Maps or Mapquest (more on this later) – it is useful to be able to quickly refer to a map when you are on the phone with a sighting.

Make it EASY for people to call you. Answer the phone on the first or second ring. If it has to go to voicemail – change your voice mail message so that the caller knows they have dialed the right number. Dogs lost from shelters, rescues, vet clinics or boarding facilities should not use their regular office line. This is confusing to callers and when the facility is closed, the call will be several hours old before it is received, wasting valuable time. People with sightings will usually only make one attempt to call you – make sure you get that call!

Be prepared to ask the right questions and get the correct information. Many owners get overly excited and in an attempt to rush to the sighting location, they forget to ask important questions. Make sure you get the name and phone number of the caller so that you can call back if you need more details or have forgotten something.

Think of this as an interview, ask questions and listen. Ask the following:

  1. Where did you see my dog? Ask them to be specific. For example: the dog was going north on Ash Street towards the Bay City Mall. On the other side of the street was Walmart.
  2. When did you see my dog? Again, ask them to be specific.  The dog was seen at 10:00 a.m. on Monday, July 7th.
  3. What was the weather like when you saw my dog?
  4. Can you describe my dog?
  5. What was he doing? Was he trotting, running, darting in and out, sleeping, playing with other dogs, walking, etc?
  6. Was he wearing a collar? What color is the collar? Did he seem okay?
  7. How was he carrying his body and tail? Was he low to the ground – almost like crawling? Was his tail up or down? Was it wagging?
  8. Thank the caller and ask if it is okay if you call them back if you think of something else.

After each sighting – post it on the map. These sightings will help determine where to continue to pass out flyers and post signs; set up a feeding station and trail camera; and possibly set a trap.

You NEVER want to disclose a sighting location publicly – on a Facebook page, in a blog, or to the media. Keep the location confidential because wanna-be heroes, reward seekers, and curious people can derail your plans very fast. Then you will be picking up and starting all over again. It is very frustrating and easier to avoid problems by keeping the details confidential.

Next, you want to visit the location. But again, preparation is everything. Make sure you take everything with you that you need including:

  1. Your sighting journal
  2. Your cell phone (set to vibrate only)
  3. A stack of flyers
  4. Smelly food (small cans or containers of pop-top cat or dog food work great) Do not use dry kibble. It doesn’t have enough odor.
  5. Water jug and a small bowl for water
  6. Familiar scented articles (your dirty sock)
  7. Smelly dog treats that you can put in your pocket
  8. A leash and collar
  9. A trail camera and supplies if you have one already (more on this in a future article)

When you arrive at the location, don’t slam the car door! Stay calm, if your dog feels your nervous energy, he may take off again. Make sure that if you have a helper with you, they also understand how important this is. It is your job as the owner, to keep control of the situation and to keep your emotions in check.

Never have a large group convene at a sighting location. You may need friends to help you deliver more flyers shortly – but have everyone meet at a coffee shop or other location, away from the sighting.

IF you see your dog – possible, but not probable: sit or lay down on the ground by yourself and scatter tasty treats around you and WAIT quietly.  It may take minutes or hours for the dog to creep towards you. You have to be patient. Any sudden moves will very likely send him fleeing again.

If you don’t see your dog – (very likely), don’t waste time driving around looking for him. Open a small can of cat or dog food and put it in a safe location away from the road. In hot weather, also put a bowl of water nearby. Then immediately begin to go door to door and flyer – speaking with everyone. If one person saw your dog, it is very likely that somebody else did also, and you may get some more information. Don’t just put these flyers in the newspaper boxes. Knock on every door and talk to someone.

If no one is home – leave a flyer at the door that you have written on: SEEN! 10 a.m. July 7th “right across the street” or “corner of this block” or “edge of your property”.  This will give the homeowner the sense of urgency that your dog is very close. Or course, your flyers have already been printed with the words, “Do Not Chase or Call” on it, right? And you aren’t offering a reward, right? Both of these steps are very important for the shy dog or the dog that has been lost from a stressful situation because the LAST thing you want people to do is to chase your dog out of the area in their attempt to catch them.

Before you leave a sighting location, check back on the food and water you have left. Has it been touched? If not, you are going to set up a feeding station: a fancy name for a blob of smelly food on the ground and a bowl of water. Try to replenish this twice a day.  If your dog has been in the area once, it is very likely he will return and you want to encourage him to stay in one area. Leave just a small quantity, it should be enough to keep the dog from leaving the area, but don’t overfeed him! You want him to visit the feeding station regularly.

Pat yourself on the back and go home and write more notes. Transfer your sighting to an online map and rest. You have done a good job with your first sighting and now you have a point of reference to start from.

Next, we will talk about monitoring your feeding station effectively.  Part 6

Our tips, ideas and articles are based on information gathered from over thousands of successful lost dog recoveries. Any advice or suggestions made by Lost Dogs of Wisconsin/Lost Dogs Illinois is not paid-for professional advice and should be taken at owner’s discretion.

Use A Feeding Station to Help Capture a Shy Lost Dog – Part 6 in a Series

Feeding stations are an important tool in the toolbox of shy lost dog recovery. It is a fancy name for a blob of smelly food on the ground, a bowl of water and a way to monitor the two. You can also leave an article of your clothing at the feeding station. Remember, lost dogs are drawn by smell – not by sight or sound. This is why it doesn’t do any good to call or whistle to them, and may in fact drive them farther out of the area.

Shy lost dogs that have gone into survival mode are only concerned with three things:

  1. finding food and water
  2. finding hiding places or shelter in inclement weather
  3. avoiding predators: humans. Yes, this means you, the owner. Don’t take it personally!

This is instinctive for dogs and it gives them the ability to live out indefinitely on their own. Never, ever underestimate your dog’s ability to survive.

The key to a successful recovery is to provide the dog with these three needs. Once these needs have been met, he will start to settle in to a predictable routine. He will start to return to a more domesticated state of mind. This can take a few hours or a few months. A feeding station is an integral part of this process.

Most owners make the mistake of not putting food out at a sighting location or if they do, they abandon it after a day or two. Big mistake! If a dog has been in an area once, it is very likely that he may return to that area, and your feeding station will help draw him there.

For a little humorous break in an otherwise serious topic, here are the top ten reasons people have given us why they won’t leave food out for their shy lost dog:

  1. Raccoons will eat it
  2. Cats will eat it
  3. Other dogs will eat it
  4. Skunks, possums, rats, aliens will eat it
  5. Will attract coyotes and foxes
  6. The lost dog will get loose stools or an upset stomach because it’s not his regular dog food
  7. The lost dog will get some rare deficiency disorder from eating cat food
  8. Food will get wet if it rains
  9. Don’t have a dog food bowl handy
  10. Too expensive to put out food for their dog

To which we say “So What? Your dog will be eating road kill soon.”

So, put your excuses aside and put the food out. The only place that you can’t legally put out food is a public park because that would be considered feeding wildlife. Almost everywhere else, if you politely ask permission and explain what you are trying to do, property owners are generally very eager to help. If you can’t get permission, set up your feeding station at the nearest point to the sighting where you can get permission, and use really smelly food.

We like to use small containers of canned cat food or inexpensivecanned dog good because it is cheap and can easily be stored in the car, but you can be creative. Rotisserie chicken pulled off the bone, canned tripe, grilled brats, bacon. Think about what would be smelly and delicious to a dog. If you have rushed out to a sighting and forgotten the food, stop at the nearest convenience store and pick up a hot dog that is cooking in one of those mini rotisseries. You don’t even need the bun. Try explaining that to the clerk!

If you are using a bowl, it is always a good idea to drizzle some of the drippings onto the ground as well. That way, if a cat or raccoon does eat all of the food, the dog will still be attracted by the smell on the ground. Don’t use dry dog food or raw meat. It doesn’t have enough odor. You want your offering to be more delicious and tempting than the restaurant dumpster or roadkill down the street.  Part 7

Our tips, ideas and articles are based on information gathered from over thousands of successful lost dog recoveries. Any advice or suggestions made by Lost Dogs of Wisconsin/Lost Dogs Illinois is not paid-for professional advice and should be taken at owner’s discretion.

Trail Cameras Help Monitor Lost Dogs Behavior – Part 7 in a Series

Monitoring the feeding station that you have set up for your lost dog will give you important clues to his behavior and condition. Here are a few different ways that it can be done, both low-tech and high-tech.

You can visually check the area every day when you replenish the food and water. By placing the bowls in some wet sand or mud, you will be able to check for dog tracks. In the wintertime, tracks will show up well in the snow. You can also sprinkle fireplace ash or cornstarch around the bowls, or place a damp white towel under the bowls to watch for footprints. Just make sure that you don’t disturb the location so much, that you make your dog suspicious and he moves on. Try to make your feeding station blend into the landscape.

Very low tech – using wet white towels checking to see if the dog was coming to the trap to eat food out of dish inside of the trap. Capture paw prints.

These simple methods have been used for years and are very effective, but they require the owner to have some basic knowledge of identifying tracks and understanding wildlife and domestic animal behavior. Trail cameras eliminate the need for this knowledge and are easy and fun to use!

In the last few years, the popularity of digital trail or wildlife cameras has exploded. These cameras are often used by hunters, but they are also popular with wildlife enthusiasts who enjoy seeing what visits their backyard at night. There are now dozens and dozens of makes and models available everywhere from Walmart.com to higher end hunting and sporting goods stores.

If you have lost a shy, elusive dog try to beg, borrow or buy a trail camera. You may have a friend that has one that will let you borrow it or you may have to purchase one – but they are now readily available for less than $100, sometimes as low as $60 if you happen to catch a sale.

It doesn’t need to be a fancy model, and actually, simpler is probably better. It does need to have the ability to take daytime and nighttime pictures (infrared flash) with a date/time stamp.

You aren’t looking for gallery quality photos – you just want to see if it is your dog that is eating the food, and what time of day he was there. Insert fresh batteries in the camera, and a blank SD card. Make sure the time/date stamp is set correctly and affix the camera to a solid object like a tree, or an overturned milk crate. You can also make a simple stand to hold the camera steady, such as the one in the picture.

You may have to fiddle with the camera position the first few days to make sure it is aimed well and getting the pictures you want. The camera instructions are usually written for deer, so bear this in mind when you are determining the height you place it at. It is better to have the camera set too low than too high. Try to get the camera far enough back from the food so that you can determine which way your dog is entering the scene and which way he is leaving.

When you check and replenish your feeding station, bring along your digital camera. Simply pop the SD card out of the trail camera and into your digital camera and review the pictures. If you see something but are having trouble determining what it is – take the SD card home (put a replacement in the trail camera) and check the pictures on your home computer. Sometimes looking at them in a darkened room will help. You may only see a tail or an ear, but it might be your dog!

Using trail camera pictures as a tool in your search will help you in two very important ways:

They will help you plan a strategy to catch your dog.

They will give you motivation and hope to continue. Your lost dog is there. You have the proof in the pictures. He is depending on you to safely bring him home.  Part 8

Our tips, ideas and articles are based on information gathered from over thousands of  successful lost dog recoveries. Any advice or suggestions made by Lost Dogs of Wisconsin/Lost Dogs Illinois is not paid-for professional advice and should be taken at owner’s discretion.


Monitoring Your Feeding Station – Part 8 in a Series

Your lost dog is visiting your feeding station! You are seeing him on the camera and you want to rush right out there and scoop him up and bring him home! Not so fast! You have worked so hard being patient and diligent. Don’t mess it up now by scaring him off. Then you will have to start all over in a new location. Now is the time to carefully strategize your next move.

Never, ever post the exact location of a sighting, your feeding station or a trap location on Facebook, Craigslist or any kind of media. Keep your cards close to the vest. You don’t need wanna-be heroes, or curiosity seekers trying to “help” you out by visiting the area. This can pressure your dog to move on again.

Don’t be alarmed if your dog doesn’t visit the feeding station every day – especially at first. He will probably come at dawn and/or dusk. At first he may just grab a bite and run off; or he may take the whole bowl and carry it off under a bush or deck, to eat in hiding. You will have more success if you position your feeding station so that he has some privacy, but also an easy escape route if he feels threatened.

Remember that the pictures you see on the camera may at first glance, not look like your dog. Study them carefully to be sure. You can download them into a photo editing program (most computers are sold with a simple one already installed) and lighten or enhance the pictures. Colors can be distorted, especially in the nighttime pictures, and dogs can look smaller or larger than they really are depending on the height of the camera. If your dog did the grab and dash; you might only get a glimpse of an ear or a tail. Generally in a few days, they will be more comfortable at the feeding station and you will get better images.

Your dog may be sharing the feeding station with other animals. No worries. We see this all the time and it makes for some pretty interesting trail camera photos. It has no bearing on whether or not you will catch your dog, so don’t let it bother you. In fact, the presence of other animals coming and going may be reassuring to your dog. It must be a safe place if other animals are there, right? You may see skunks, cats, raccoons, possums, crows, and even other lost dogs on the photos. Switching to beef-based foods may reduce the number of other visitors.  If you are having lots of cats and raccoons visit, try switching, especially if you have been using fish.

While you are waiting for your lost dog to fall into a predictable pattern of a behavior, you want to be thinking about the next step: capturing him.

For some dogs, especially those that are extremely bonded with  their owner, the owner may simply have to sit on the ground, close enough to the feeding station that they can see the food bowl, but far enough away that the dog doesn’t feel threatened. Plan your visit when you expect your dog, judging from the pattern of the date/time stamp on the pictures. Bring a book and your tasty treats, collar and leash,  and sit quietly on the ground. Read, sleep, or check emails on your phone. But set your phone to silent and don’t talk on it! Be patient. Your dog may appear and approach you. Don’t make any sudden moves. It may take a few days of this, but your dog might crawl right into your lap, when the lightbulb suddenly goes on in his head.

If you lost a newly acquired dog or foster dog that isn’t bonded to you, it might not be so easy; and you should probably consider using  a humane trap. Now is the time to start inquiring about where you can rent, borrow or buy one. Check your local animal shelter or animal control facility first. They may have one available that they will rent for a small fee.

Does your dog generally like to go into a crate or kennel? Dogs that are very comfortable being crated are usually easier to trap.

Is your dog fearful of a kennel or crate? Check to see if  there a fenced yard, tennis court, ball diamond, or garage nearby that you can lure your dog into. Or maybe you will want to slowly set up some temporary kenneling.  Again, patience is the key word. Slowly moving the food bowl, day by day closer to an enclosure until your dog is finally eating in the enclosure can be a very successful method.  If you proceed too quickly, you risk scaring him off to another area. Starting all over is always slower than being methodical and patient, so take your time.

Next we’ll talk about humane trapping – because we have many tips to share that will help you maximize your chances for success. Part 9

Our tips, ideas and articles are based on information gathered from over thousands of successful lost dog recoveries. Any advice or suggestions made by Lost Dogs of Wisconsin/Lost Dogs Illinois is not paid-for professional advice and should be taken at owner’s discretion.

Humane Trapping, Before You Begin – Part 9 in a Series

Ellie, shy basset hound missing 30 days, trapped in a humane live trap.

We have been following the story of Toby, a shy lost Australian Shepherd who bolted from the sound of fireworks on July 4th. We hope we have given you some tips and ideas on how to effectively lure a shy, lost dog either back to where he went missing from or to a safe location where you can implement a plan to catch him. Remember, throughout the entire process, you should always keep your dog’s bed, smelly food,  water and familiar-scented articles at the spot he went missing from – even if it is not his home. Many lost dogs do return on their own; so make it easy for him to find his way back.

This is the first of a few articles on humane trapping your lost dog. It is  meant to be used for reference to help an owner whose dog is already coming reliably to a feeding station.  If you aren’t at that point; please go back and read the previous articles first.  We are going to begin at the end – what can go wrong, because it is important to understand the liability and seriousness of trapping BEFORE you begin.

Although humane trapping can be very successful it comes with a lot of risk and expense.  If you are not prepared to commit to the process, don’t begin it. Come up with another strategy to find your dog.

Many owners want to rush out with a trap, throw it down on the ground, and expect POOF! their dog will be in it the next day. It is rarely that easy.

You MUST understand the risks. Remember: It’s a trap! It’s not a cage or a crate. The door comes down fast and hard and can injure or kill something that it strikes. Animals that are entrapped can panic and injure themselves.  What all can go wrong?

  • The lost dog can get injured or killed
  • Neighborhood pets or children can get injured or killed
  • Wildlife can get injured or killed
  • Traps can get stolen or dogs can be stolen from the trap
  • Owners or helpers can get bit resulting in costly medical bills and possibly the euthanization of the dog (if it is a foster dog owned by a shelter or rescue)
  • Transporting large dog traps (4 to 6 feet long x 2 feet wide and high) can damage your vehicle or cause injury while lifting

How long does it take a trap to work? You may catch the dog in an hour. Or, it may take days, weeks or months. You won’t be able to trap in extreme weather conditions (heat or cold), so be prepared for lengthy delays; during which you must still replenish the feeding station and monitor the trail camera. Make sure you are prepared for the time, emotional and financial commitment involved with trapping.

You will need to check the trap several times a day. Ask yourself these questions:

  • Do I have a reliable vehicle?
  • Can I commit to the time required? Can I get time away from work and family commitments to check the trap several times a day?
  • Can I afford to cover the cost of trap rental, gasoline, bait, bedding and other trapping supplies for several days, weeks or even a month or more?
  • Can I afford to cover the cost to replace the trap if it is stolen or damaged? ($400 to $500 for a large dog trap )
  • Do I have a support system in place if this turns into a long time endeavor?
  • Do I have personal liability insurance and health insurance to cover myself if something goes wrong? Do the people helping me have insurance?
  • Is trapping legal where you live? Check BEFORE you begin.

You MUST have a plan in place for when you catch your dog. Think this through beforehand. The worst thing that can happen is you trap your dog and as you are taking him out of the trap, he slips away again. You may never get a second chance to trap him. Traps must be transported with the dog inside to a safe, enclosed place – a garage or vet clinic is ideal. Ask yourself before you begin:

  • What is my plan when my dog is in the trap?
  • Where am I going to take the dog and trap?
  • Do I have enough people to lift the trap and the dog into a vehicle? (Possibly more than 100 pounds) Do I have enough gloves for all of the helpers?
  • Do I have a big enough car or truck to transport the trap and dog safely?

Thinking this through before you begin is imperative to success and your dog’s safety. Next we will talk about choosing the best style and size humane trap for the job.  Part 10

Our tips, ideas and articles are based on information gathered from over thousands of successful lost dog recoveries. Any advice or suggestions made by Lost Dogs of Wisconsin/Lost Dogs Illinois is not paid-for professional advice and should be taken at owner’s discretion.


Choose the Right Humane Trap for the Job – Part 10 in a Series

Size Comparison (from Left to Right)
Tru Catch Large 2 door trap – 22″ x 28″ x 60″
Havahart Large Raccoon Trap 15″ x 15.5″ x 42″
Havahart Small Trap 10″ x 12.5″ x 32″ (not recommended for dogs)

You’ve decided that you are prepared to accept the risk and expense of trying to trap your shy lost dog. If you aren’t aware of the risks or financial commitment involved, please read Part 9 of the series before you continue.

Choose your humane trap wisely. You may only get one shot at trapping your dog so make sure you set yourself up for success. You may be limited to what is available to rent or buy in your area, but if at all possible, follow these guidelines.

1. Size: Always choose a trap that your dog can easily stand up and turn around in. Larger is better than smaller. Some dogs won’t mind entering a small enclosed space, but some will: especially those that have been lost a long time or are distrustful and will want an escape route.

2. Doors: If at all possible choose a trap with a front and rear door. The rear door is used to access the bait  and it is very handy. Otherwise you will physically have to crawl into a large dog trap, very awkward  – especially on rainy or snowy days.  With a smaller trap, you will need to have very long arms, or some kind of tongs to position the bait. The rear door can also help your dog become comfortable with the trap, and you can allow him access from both sides and use it as a shelter (more on this later).

3. Design: There are some large coyote traps on the market for a very cheap price at farm supply stores. Don’t waste your money and/or endanger your dog with these. They are flimsy and poorly designed.  The trip plate is set in the middle of the trap instead of almost to the back, where it should be. We have heard of many incidences where the dog begins to enter but then gets suspicious. He has already stepped on the plate (because it is in the middle) and then starts to back out. The door isn’t all the way down so he manages to push his way out, bends the trap all apart, and is thereafter scared to go near a humane trap. Don’t risk it! Remember, you will have one shot at this. If your dog gets scared, then you will have to start all over with a new plan that doesn’t involve a humane trap.

4. Functionality: The trap should operate as smoothly and quietly as possible. Give it a few test runs by setting it and tripping it with a stick. If it isn’t working properly, don’t use it. The wire shouldn’t be all bent out of shape. When it is closed, and a dog inside, the dog shouldn’t be able to push his nose against the door and get it open enough to get his head or neck partway out. He could injure himself and panic.

There are some excellent brands of traps including TruCatch and Tomahawk. Havahart makes a large raccoon trap that is suitable for catching a small dog, probably up to about 20 pounds.  Heart of the Earth Animal Equipment has a good website with a large selection of live traps. Again, make sure, you choose a trap large enough for the dog you are trying to catch.

If you are renting a trap from a shelter or animal control facility, be prepared to pay a deposit, a rental fee, and to sign a liability waiver.  In smaller communities, you might also check with your local police department or town office. If they are in charge of animal control for the area, you may be able to rent a trap from then.  The large raccoon trap from Havahart is available at many farm supply stores.  If you have to purchase a trap  online: start early. Traps are large and cumbersome to ship, so substantial shipping charges usually apply and delivery may be slow. Part 11

Our tips, ideas and articles are based on information gathered from over thousands of  lost dog recoveries. Any advice or suggestions made by Lost Dogs of Wisconsin/Lost Dogs Illinois is not paid-for professional advice and should be taken at owner’s discretion.

Location, Location, Location! Pick the best spot for your humane trap. Part 11 in a series

Choose the spot wisely, and you’ll have a better chance of successfully trapping your shy lost dog. Choose it poorly and it can be an exercise in futility. First and foremost, you MUST have the landowner’s permission to set a trap on his property. If you don’t, you are setting yourself up for a whole lot of legal trouble. Trapping can be risky to both wildlife, pets and people. Landowners need to be aware of their potential liability when they allow you to set a trap on their property.

Because of the liability, there are several places where you are unlikely to get permission. So be forewarned,  you may want to choose a different spot. The places you are unlikely to get permission are:

  • Playgrounds
  • Public parks and campgrounds
  • Churches
  • Schools
  • Government buildings
  • Large corporations

We have the most success getting permission from a private homeowner, farmer or small business owner. Call them up and arrange to meet with them; explain your situation and show them a picture of your dog. Many private property owners will sympathize with you and give you the permission you need to set up a feeding station and a trap.  Make sure they understand that you may be visiting at odd hours, several times a day. Otherwise, you may wear out your welcome quickly. An ideal situation, is when you can get easy access by a path or side road. Then you won’t have to be driving past their house at all hours of the day and night.

Now, where to actually put it? The site needs to be level and cleared of any debris that might stick up through the bottom of the trap and interfere with the trip plate. If it is a two door trap, you will need to have easy access to both sides. You don’t want to have to keep pulling it out and moving it to rebait it.

Make the trap “part of the landscape”.  Look around and think like a shy, lost dog. They usually like to slink along the side of a building or a tree line. Positioning your trap along a building, fence line or tree line is usually a wise choice.

You don’t want it anywhere that the public can see it or may stumble across it. In fact, you NEVER want to disclose a trap location or a feeding station publicly – never on a Facebook page, in a blog, or to the media. Keep the location confidential because wanna-be heroes, reward seekers, and curious people can derail your plans very fast. Then you will be picking up and starting all over again. It is very frustrating and easier to avoid problems by keeping the details confidential.

Choose a spot where you can see the trap from a distance, possibly with binoculars.  You can put a small square (about 4″)  of white material on the door of the trap to help you determine from a distance if it has been tripped. The less you disturb the trap location, the better. Your shy, lost dog needs the confidence that he can visit the site, eat and relax without being disturbed.  Part 12

Our tips, ideas and articles are based on information gathered from over thousands of  lost dog recoveries. Any advice or suggestions made by Lost Dogs of Wisconsin/Lost Dogs Illinois is not paid-for professional advice and should be taken at owner’s discretion.


Your Trapping Supply List – Part 12 in a series

You’ve rented or bought your trap to catch your shy, lost dog. Now all you have to do is go out and throw it on the ground,  right?  And your dog will jump in, right? Sorry, wrong. Again preparation is the key and we’ll try to walk you through it step by step.

Many people give up trying to trap their dog in frustration and it is generally because they haven’t taken the time to do it properly.

Here is what you will need in your trapping supply kit:

  • Trail camera and feeding station (should already be set up at this location)
  • Gloves
  • Flashlight
  • Flyers
  • Bungee cords and electrical ties
  • Something to entirely cover the trap floor like a cotton door mat, thin quilting or carpeting scraps (if it is too thick it will interfere with the trip plate mechanism
  • A large plastic tarp if you decide to cover the trap
  • A white washcloth to use as an indicator for when the trap is sprung
  • Scissors, packing tape and pliers
  • A padlock and length of heavy chain (from the hardware store)
  • Butter flavored Pam cooking spray
  • Small hatchet and pruning tools

Quietly unload your equipment and trap with only one or two helpers. Remember, your dog has been visiting this location to eat and he might be lying in the woods watching you right now! Keep your voices down, get the trap set up and then get out of there as quickly as possible. You don’t want to frighten him away.

Choose your location based on what you learned in Part 12 of this series.  Clear any debris from the ground. You may have to prune a few trees or remove any small plants that will poke up through the bottom of the trap. Securely lock the trap to a tree or solid object using your padlock and chain.  The number one reason that shelters have stopped lending out traps is because they get stolen and not returned. Prevent that from happening and help the next person who has lost their dog and needs a trap! Make sure that everybody that is helping you has a key to the padlock or knows the combination.

In winter or inclement weather you will want to wrap the entire trap in a plastic tarp. This will provide your dog with shelter and prevent the bedding from getting wet.  Leave both ends open so the dog can see through. Roll the trap in the tarp and use your electrical ties to secure it to the wire of the trap. You will have to punch small holes in the tarp with your scissors to push the electrical ties through. Get it really nice and tight. You don’t want the tarp to flap in the wind and scare your dog.  Tape one of your dog’s flyers to the top so that anybody that stumbles across the trap knows what you are trying to do.

In summer, you might want to leave the trap unwrapped, for better air flow. It can also depend on the nature of the dog also. Some dogs enjoy the feeling of a “den”. Some will feel claustrophobic and prefer to feel like they have an escape route.

ALWAYS cover the entire floor of a trap. Lost dogs often have raw, sore, sensitive feet from travelling. They won’t want to walk on the wire floor. Make it easy and nice for them.  Spread your hands and push down on the floor covering. If you can still feel the wire through the covering, so can your dog. You need to make it thicker.  Make sure the floor covering fits well and doesn’t interfere with either the trip plate or the door. You might need to cut it with your scissors to fit. It shouldn’t hang out the front of the door.

If your dog has been lost a really long time and is in a very feral mode, you may want to use dried leaves or straw instead of something that smells too “domestic”.

Attach a  white washcloth in the middle of the door of the trap using electrical ties. This will enable you to see from a distance if the trap has been tripped.

Next, bungee the trap open. In the next installment of this series, you will see why.

Sprinkle a few bits of hotdog around the front of the trap. Check your trail camera position to make sure that it will capture pictures of your feeding station and your trap. Ideally the two should be about twenty to thirty feet apart.

Give the trap and the ground surrounding it a light coating of Pam butter flavored cooking spray. This acts as a scent blocker and is very important if you have people helping you that your dog does not know. You can also buy scent blockers at hunting supply stores but Pam works just as well, is less expensive and readily available. Spray the area that you have walked on and back out of the area – lightly spraying it also.

Then get out of there! Your dog needs time to get accustomed to the look and smell of the trap. Don’t disturb him.

Notice, we didn’t discuss baiting the trap? That’s because we’re not ready to do that yet. In the next article, you will see why.  Part 13


Our tips, ideas and articles are based on information gathered from over thousands of  lost dog recoveries. Any advice or suggestions made by Lost Dogs of Wisconsin/Lost Dogs Illinois is not paid-for professional advice and should be taken at owner’s discretion.

Successful Trapping: Go Slow to Go Fast Part 13 of a Series

We can see that this dog, Shabby, is very comfortable with the trap. Time to move the food inside! When we can see her going in and out comfortably, THEN we will set the trap. Note that the date/time stamp on this camera is set wrong. Take the time to set it correctly before you begin. This is invaluable information.

You’re all ready to set up your trap and catch your dog. This should be fast and easy, right?   You’ve done all of the careful preparation and set up an inviting little “dog cave”. Your dog should appreciate that and jump right in, right? Sorry – wrong. This is the number one place that people are too impatient and then give up on the trapping process, claiming it “doesn’t work” or “my dog is too smart for the trap”.

Throwing a trap on the ground and hoping that your dog happens to jump in is like an outfielder closing his eyes and holding his ball glove open up in the air. Is there a chance that the ball will fall in it? Yes, I guess so. But there is a lot better chance of him catching the ball if he strategically uses all of his physical and mental powers to position himself to catch the ball.  Remember, you have ONE chance to get this right. Make it count.

This is where “going slow will be faster than going fast”.

You already have your shy, lost dog coming to the feeding station. You are already seeing pictures of him eating on your trail camera. (if not, please go back and read those installments in the series) You have now added the trap to the “landscape” and it may take a few days for your dog to get accustomed to it. He will sense that something is different and strange. Your goal is to make that transition as easy as possible. Keep the feeding station at least 20 – 30 feet away from the trap at first. Use bungee cords or electrical ties to keep the trap open – so the door can’t come crashing down and scare him.

If you have a trap with two doors, you may want to remove the rear door so the dog can go all the way through at first. This helps with very claustrophobic dogs and encourages them to use the trap as a shelter and sleeping spot.

Watch your pictures. When he is eating at the feeding station comfortably, move the bowl closer to the trap. When he is comfortable with that – move it closer again. Within a few days, you should be able to put the food under the door of the trap. (that is the scary part for a lot of dogs). When he appears comfortable, move the bowl into the trap – just inside the entrance. But you still have it bungeed open. It can’t scare him. Finally move it to the back of the trap behind the trip plate. When you see that he is going all the way in the trap, eating and looking relaxed, you can set the trap. You should know what time he is coming to eat and you can set it just for that time period.

The above method called “luring the dog into the trap” will save you a lot of grief and frustration because:

  • you won’t be catching and endangering wildlife, cats and other dogs
  • you won’t be spending all your time cleaning the trap and washing and replacing the bedding after catching other animals (who will usually urinate and defecate in the trap)
  • you won’t be having to check the trap every couple of hours (possibly causing your shy, lost dog to abandon the feeding station)
  • you will encourage your lost dog to use the trap as a shelter, so when he is finally trapped he will be comfortable and not panic
  • you will be able to continue during extreme hot or cold weather because you won’t be worried that you will endanger the life of an animal that is caught

Okay, we’re almost done. The last section will talk about baiting the trap, what works and what doesn’t work. Stay tuned, you’re almost done!  Part 14

Our tips, ideas and articles are based on information gathered from over thousands of successful lost dog recoveries. Any advice or suggestions made by Lost Dogs of Wisconsin/Lost Dogs Illinois is not paid-for professional advice and should be taken at owner’s discretion.

Baiting the Humane Trap – Part 14 in a Series

Finally! You have your humane trap for your shy lost dog set up. You have been feeding him at a feeding station and know his routine. He is comfortable with the trap being there because you have made it “part of the landscape”.  You have been moving the bowl closer and closer to the trap and finally under the door of the trap. You are monitoring the progress from the pictures on your trail camera.

Still, for some dogs, taking the risk to go into the trap is a big step. It is scary. The longer they have been lost, the more distrustful they have usually become.

So baiting the trap with something absolutely scrumptiously delicious is important. There aren’t any hard and fast rules except one. Think SMELLY.  You want the smell of the food to be so wonderful, so delectable, that your dog is willing to take the risk.  This means no dry dog food! Dry dog food is not smelly. For some reason that we have yet to figure out, people want to put dry dog food in a trap. Sorry, it just doesn’t work well. We don’t care if it is the ultra premium dry dog food that costs $60 a bag and your dog gobbles up at home. It doesn’t have the sort of smell required to encourage your dog to take the risk.

So here are some better suggestions that have worked for us.   We are sure you will also come up with some on your own:

  • rotisserie chicken from the grocery store (removed from the bone)
  • Kentucky Fried Chicken (removed from the bone)
  • grilled bratwurst
  • canned tripe (the brand pictured above is available at many specialty pet food stores)
  • fresh green tripe (available from speciality pet food stores)
  • inexpensive canned cat or dog food (generally the cheaper the food, the smellier it is)
  • meatballs in BBQ sauce

The possibilities are endless. Walk through the hot deli section of your grocery store and sniff. What smells delicious? What smells irresistible?  Remember, a dog’s sense of smell is at least 100 times better than a human’s. So you have the ability to draw your dog from a really long distance if you choose something smelly. Change it up. If something isn’t working and your dog doesn’t appear willing to “take the risk” try something else. Always make sure that your dog is getting some food at the feeding station though. You don’t want him to abandon the location out of frustration and move on.

Imagine you are in a restaurant and you haven’t eaten all day and are starving. The service is slow and nobody has come to take your order. The waiter passes by your table with a plate of steaming hot fresh rolls. He is distracted and you think: Maybe, just maybe I can sneak a roll off the plate and he won’t notice.  You are “willing to take the risk”. That’s how you need your dog to feel.

If your dog is getting food from other sources also (very likely); you have to make sure your offering is better. You may have to find the other food sources and cut them off. This can be tricky and we’ll cover this in more detail in another article. But, regardless, you will have the best chance of success if you are offering the most delicious food that your dog has smelled in a long time.

Remember, don’t set the trap until you have seen on your trail camera pictures that your dog is comfortably going in and out and eating. This is your best chance for success and is much better than a hit or miss attempt which can scare your dog, and make him abandon the location. Then you have to start all over again somewhere else.

Toby, that shy Australian Shepherd who bolted from the sound of fireworks will be safely caught soon because you have carefully and patiently followed all of the steps to catch a shy, elusive dog. Good Work!  Part 15

Our tips, ideas and articles are based on information gathered from over thousands of successful lost dog recoveries. Any advice or suggestions made by Lost Dogs of Wisconsin/Lost Dogs Illinois is not paid-for professional advice and should be taken at owner’s discretion.